I’ve already shared how to create backups using BackWPUp. The only downside of BackWPUp is that it doesn’t have a 1-click restore feature. Until such a feature is developed, this post is what you’ll want to come back to when you’re faced with restoring a site.
In the previous post I recommended that two types of backups be generated: a database-only and a full site backup. I’ll be showing how to restore both.
Obtaining the Backup Archives
To start off, you’re going to need the backup archives. Obviously. Where do you get them? Well, there are a few options for saving your backups in BackWPUp, including sending them to a remote FTP location or even Dropbox. The most common option is to save it within a folder on your WordPress installation. If you have access to the administration console go to BackWPUp -> Backups to see a list of the most recent archives.
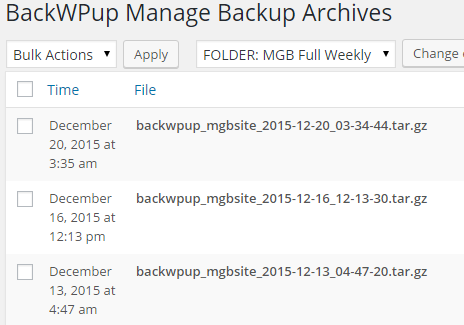
The list of recent backups for a corresponding job.
You can select the job type from the drop down list at the top to choose between database-only or full backups. To download any archive, hover your cursor over it and select the Download link. Piece of cake.
If your WordPress installation has been corrupted and you can’t access the administration console, you can still retrieve the archives through FTP. Within your WordPress folder navigate to wp-content -> uploads -> backwpup-xxxxxx-backups and download the latest archive.
Restoring the Database
The first step in restoring your site is getting the database back online. Open the archive you downloaded. You can use WinRAR or 7-Zip to do so. Inside you’ll find a .SQL file. This is your entire database backup.
The next step is to log in to your web hosting account and find the icon for PhpMyAdmin. Click on it.
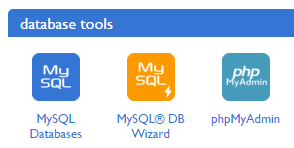
PhpMyAdmin in Bluehost’s CPanel.
Once inside PhpMyAdmin, select the database corresponding to your website from the left-side panel. You will see a list of all the tables in the database in the main panel. In the top section select the Import tab.

This is what the PhpMyAdmin interface should look like.
From the Import form select Browse your computer and then click Choose File to select the .SQL file extracted in the first steps.
Complete the process by clicking the Go button and confirming. This will restore the database.
Performing a Full Restore
To do a full restore you need to complete the above steps and restore the database first.
Next, you need to upload the archive to your website’s folder. To do this, head back into your hosting account’s CPanel and look for the File Manager icon and click on it.

The second is the File Manager icon in Bluehost’s CPanel.
Once inside the File Manager, navigate to your site’s folder. It will typically be something like public-html/[your site’s name]/ and contain at least three folders named wp-admin, wp-content, and wp-includes. Select all of the folders and files in this directory and delete them.
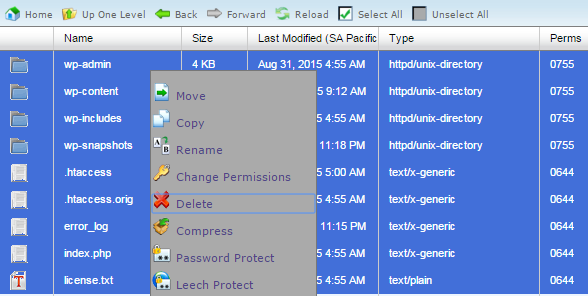
Delete the old contents of your website.
This is the fastest way you can clear the contents of your website’s directory. You can also do it through an FTP browser but it’ll take FOREVER. When the directory is clear, click on the Upload button at the top of the page and select the backup archive for your site. Wait for the upload to complete. It might take some time depending on the size of your site.
Warning: Your hosting provider might place limits on the size of files uploaded through the online File Manager so if you’re unable to upload it this way, do it through your FTP client.
When you go back to the directory list you should see the uploaded archive. Right-click on it and select Extract.
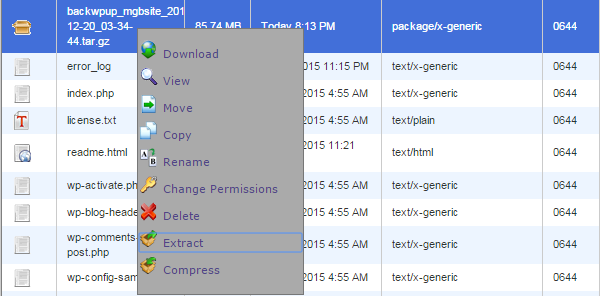
Extract the archive from the file list.
This will unpackage all the files from the archive. Once the system finishes extracting the archive, delete the following files:
- The uploaded archive. If you followed the instructions from the backup post it will be in a .TAR.GZ format.
- The .SQL file.
- The text file that includes the word pluginlist.
- Backwpup_readme.txt
- Manifest.json
If you successfully completed the database restore instructions then your site should be completely restored. That’s it! Go ahead and test your site to make everything is working appropriately.
Alternative Upload Method
If you’re unable to access your online File Manager, you can restore the contents of the archive entirely through FTP. The reason I don’t recommend this as a primary strategy is because of how long it takes to delete the old contents this way. If you end up using FTP to upload the contents of your site, be sure to extract the contents of the archive on your computer first. Then, select all the extracted files and drag them over to the server.
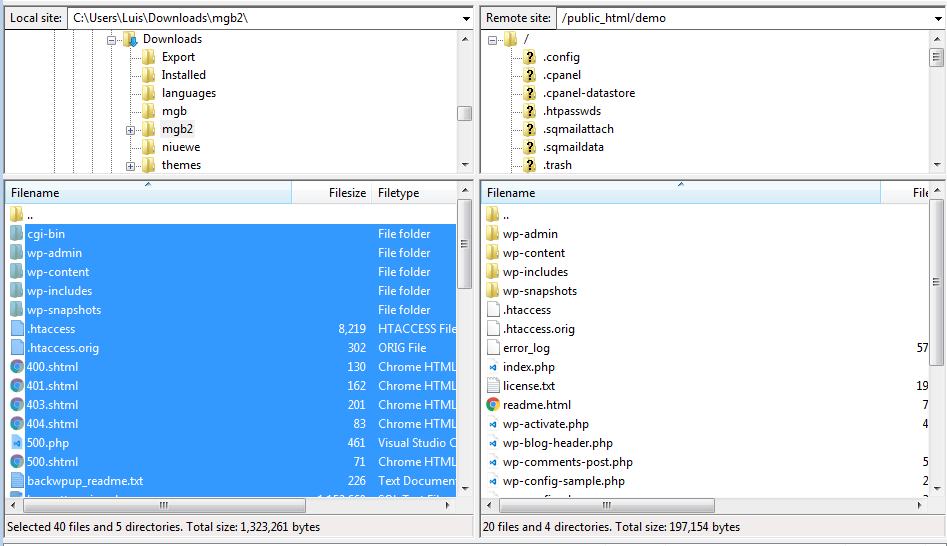
Uploading the site contents using FTP.
Just like the previous case, make sure to delete the aforementioned files once the process is done.
Important: If you perform a Full Restore you need to remember to reinstall the BackWPUp plugin and activate it. It will remember your job configurations but it needs to be reinstalled manually.
If you have any questions, let me know in the comments. If you’re having trouble and need someone to restore your site for you, send me an email and I’ll gladly help you out.

Great tutorial. Thank you.
I upgraded one of my plugins and since it upgraded it stopped working.
I made a full backup with BackWPup before I upgraded. How can I restore just the one plugin?
Thanks
Hi Joel,
If you just want to restore a single plugin, what you can do is download the whole zipped backup file to your computer, then extract it and go to the /wp-content/plugins folder. You’ll find your old plugin folders in there. Select the one you want to restore and put it in a zip file. Now go to your WordPress backend, delete the plugin from your Installed Plugins list and then install it again using the zip file you created.
Voila!
Hi, I made a full backup but I can’t seem to restore my database. The php panel keeps giving me an error and I dont know what’s wrong.
I was able to restore a database but it was a database I created months ago using another plugin. I’m worried it might not work because my last site backup was yesterday while the database backup was months ago.
What would you suggest I do please?
Hi Samuel, what’s the error that you’re seeing? How large is your .SQL file?