
Android has always had the advantage of being a more open mobile OS giving users the ability to access developer settings. However, since Android Jelly Bean 4.2. It’s more than likely that Google hid away this option to avoid having regular consumers poking around in options they didn’t fully understand, but for the rest of us, Developer Options open up so many possibilities that they become essential tools.
Activating in 3 easy steps
Enabling Developer Options on your Android device (Jelly Bean 4.2 and higher) is really simple. Just go into the settings and open the About Phone menu. Then tap Build Number 7 times. Around the 4th or 5th tap you’ll get a little message telling you you’ve almost got it.

Tap here 7 times to enable Developer Options
Once that happens, you’ll get a message indicating that you successfully enabled Developer Options and when you go back to the bottom of the Settings menu, you’ll see a new option present.
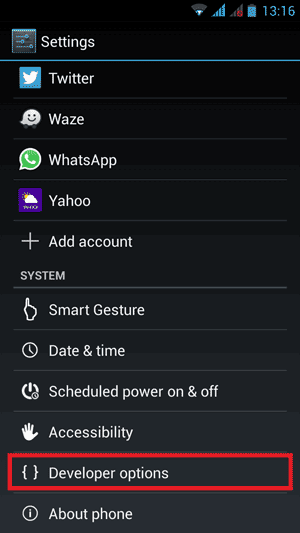
Developer Options has been enabled.
To complete the process. Go into Developer Options and slide the option to ON at the top. For good measure, it’s also a good idea to enable USB Debugging. This will let your computer interact with your device on a deeper level when they’re connected.
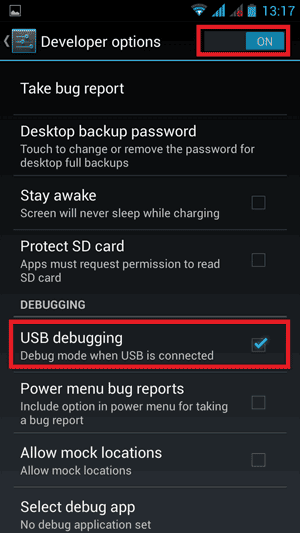
Enable Developer Options and USB Debugging.
That’s it! Check out the rest of the cool features available under Developer Options for your Android device. You can also check out some of the articles here on Luisten.com to see what you can do with this setting activated.