Images. You’re going to need them on your webpages. They’ll not only help make your site look better and keep your visitors engaged but they help increase your site’s rank on search engines. The thing is, you can’t just throw images on your website without some basic preparation. Poorly optimized images can actually hurt your ranking or discourage visitors if they take too long to load. Haven’t you ever rage-quit a site because it took too long to load? I have.
We’re going to get straight to work here but in an upcoming post I’ll take a look at the fundamentals of how images work online and what optimization and compression really do. Enough already, let’s crush these pics!
Method 1: Image resizing
The number one sin in poor image optimization is uploading the wrong size images on your site. Countless times I’ve seen full resolution pictures (2560×1920) constrained in a 300×200 area. It takes much longer to load and causes an unnecessary burden on your server.
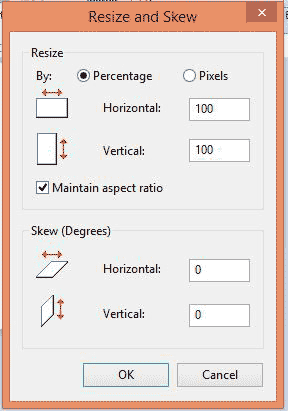
The easiest way to take care of this is to resize it in your computer before uploading your image. Just figure what size the image needs to be on your page and use your favorite image editing program to shrink it down. This can be Photoshop, GIMP, Picasa, or even Paint. Seriously, just do it in Paint. There’s no shame.
If you’re using WordPress as the platform for your site, it has some built-in resizing functions. When you choose to add an image to a post you’ve likely seen that there is an option at the bottom to choose what size you want to load your image in. This isn’t just WordPress forcing a constrained height and width to your image. When you upload an image, WordPress will typically create 3 extra copies of your image at different sizes.
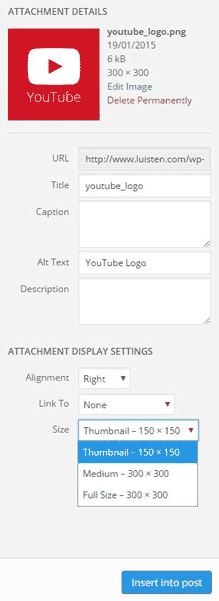
The image size option is at the bottom.
The 3 standard sizes are Thumbnail (150×150 cropped), Medium (300px on the longest side), and Large (1024px on the longest side). If you want to change these default values go to Settings -> Media. This won’t change the size of the images you already uploaded but you can apply the changes to your existing images by using the Regenerate Thumbnails plugin.
Remember, avoid using the Full Size image option in WordPress unless you actually want to show a large full-res picture.
Method 2: Online Compression Tools
There are a couple nifty online compression tools that offer a great results at no cost: Smush.It and Kraken.io. Both services work in the same way: you upload your image file, the service performs some compression magic and then you download your compressed image at a fraction of the original filesize. Smush.It is a service from Yahoo and is always free. Kraken is also free with the same restrictions as Smush.It but you can get the PRO version which will give you some extra functions and enable you to upload larger images.
Both of these services also have WordPress plugins that will automate the image compression process. When you have the plugin installed, it’ll compress your images as soon as you upload them so you don’t have to worry about forgetting to run your images through a compression algorithm. The Smush.It plugin is called WP Smush.it while the Kraken plugin is called Kraken Image Optimizer.
Remember that these are image compression tools and not image resizing tools. If you run an image with large dimensions you’ll receive the same sized image but with a smaller filesize. You should still resize your images before using this method for the best results.
Method 3: Optimizing Images in Photoshop
While Adobe Photoshop may be out of most people’s budget, if you happen to have it in your arsenal, it boasts the best image compression tool available. Out of all the compression methods I’ve tried, Photoshop always comes out on top.
To optimize an image for web in Photoshop, go to File -> Save for Web and you’ll see a window showing you several compression and resizing options as well as a preview pane and an approximation of how big your resulting image’s filesize will be. This let’s you tweak the setting so you can achieve the perfect balance of size and quality.
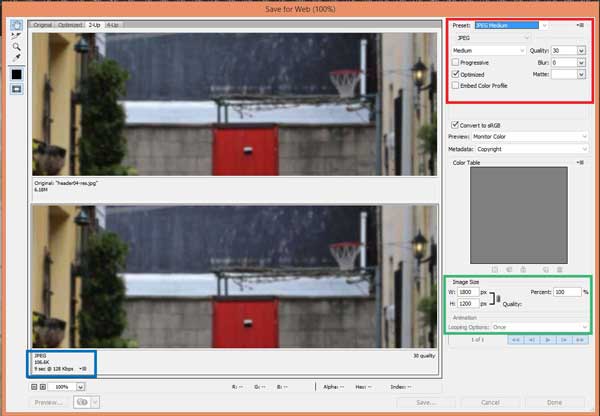
Select the right preset in the red area. The green area lets your resize the image, and you can check the final filesize in the blue area.
If you feel overwhelmed by the options on screen stick to the JPEG Medium and Low presets if you’re dealing with photos or PNG-8 if you’re dealing with an image with a limited range of color. Make sure you go ahead and resize your image appropriately for the space it’ll occupy.
My only gripe about using Photoshop to optimize images for web is that the process can be time-consuming. It certainly has a bit of a learning curve but there is an upside. The advantage is that once you get used to it, you can create your own presets and automate the process so you can batch-optimize your images.
Sometimes you’ll only shave of a few kilobytes when you compress your images and while it may not seem like much, these quantities add up and provide a better user experience. Making image optimization a habit when creating content for your website will pay off.
Do you have any image optimization methods for your online content? Let me know in the comments.